Occasionally after demonstrating an exercise or movement drill at the gym and then giving others time to practice, I hear comments like, “Wow, you made that look way easier than it actually is.”
My typical response is something along the lines of: “Well, I couldn’t always do it. That’s just what happens after intentionally practicing for 15+ years.”
Of course, there’s always a bit more to any story, including this one. (No, I’m not an android like some people joke… at least, I think they’re joking. Either way, I am human. Honest! 😉)
One of the many factors that has contributed to the skills and abilities I’ve developed over the years is paying extra attention to the movement patterns common to multiple exercises. This has enabled me to accumulate a lot more time practicing the basics than what it might appear at first glance.
Over the next couple of weeks, I’ll cover some of those fundamentals and how they apply to two seemingly different exercises: the get-up and the kettlebell swing.
Check out these past tips if you’re either not familiar with those exercises or for a quick review:
And now that you’re back, lets move on to this week’s fundamental.
Shoulder packing
Shoulders are amazing joints that have a huge range of motion because of their structure. That structure and mobility allow us to do things like scratch our heads, reach for our wallets, and wave.
But when we need to lift something heavy (e.g. a weight in the gym, your friend’s couch, a sleeping child) or otherwise hold on to something (e.g. a bag of groceries, the dog’s leash with a rabbit in view, a pull-up bar), it also makes them more susceptible to injury if we’re not careful.
That’s where shoulder “packing” comes into play. In this case, packing is basically engaging the musculature in and around the shoulder to prepare it for safely handling a heavy load.
While I’ve heard and used a variety of different cues to teach the position, I think the simplest and most effective is to hold (or imagine holding) a dish towel in your armpit while someone else is trying to gently tug the towel away.
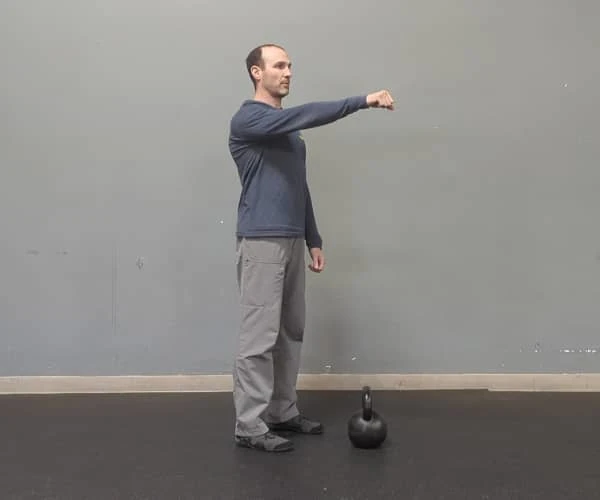
In this example, your arm should be at your side. However, once you’re comfortable with the position, you should be able to produce a similar (but not exact) feeling with your arm straightened in front of you, to the side, overhead, and while moving throughout all of those positions. Without holding the towel, of course.
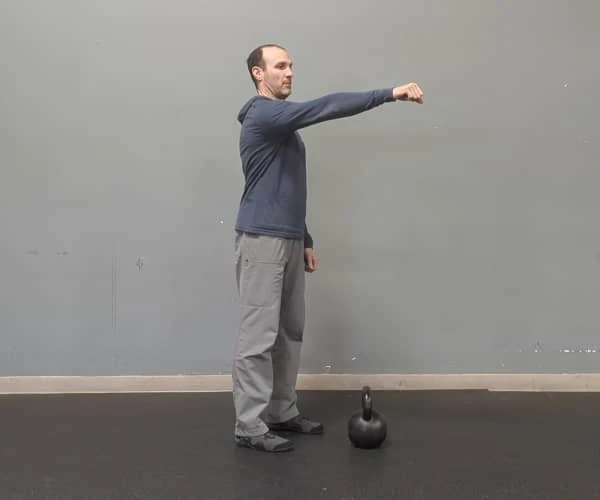
If you struggle to produce the feeling in any of those additional positions, it can be helpful to first feel the opposite feeling. You can do this by either shrugging your shoulder (i.e. up towards your ear) or reaching farther in front of you without twisting your torso, like the first image below. Then simply reverse the movement, and you should be in about the right position.
Once you’ve been able to produce the packed feeling in different unweighted positions, you can begin to practice exercises with added weight.
A smart progression might look as follows:
- Exercises with no/minimal movement such as a plank or farmer carry (holding weights at your side like how you’d carry a bag of groceries)
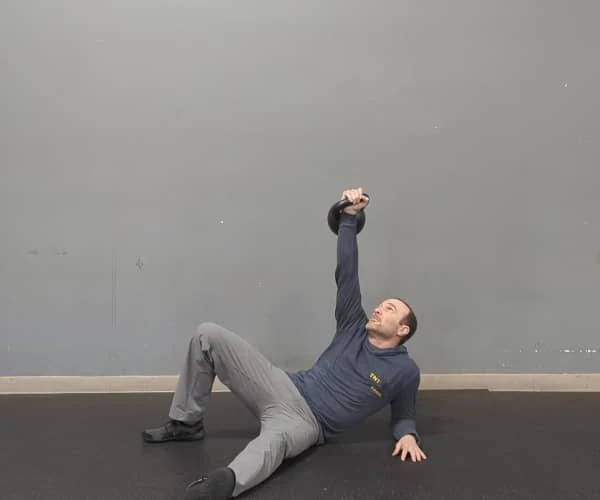
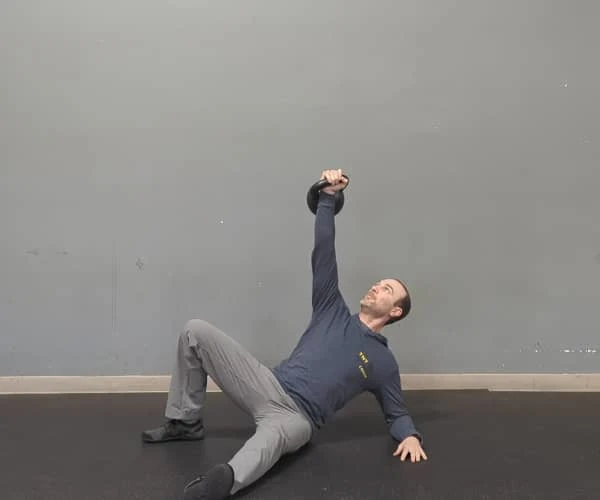
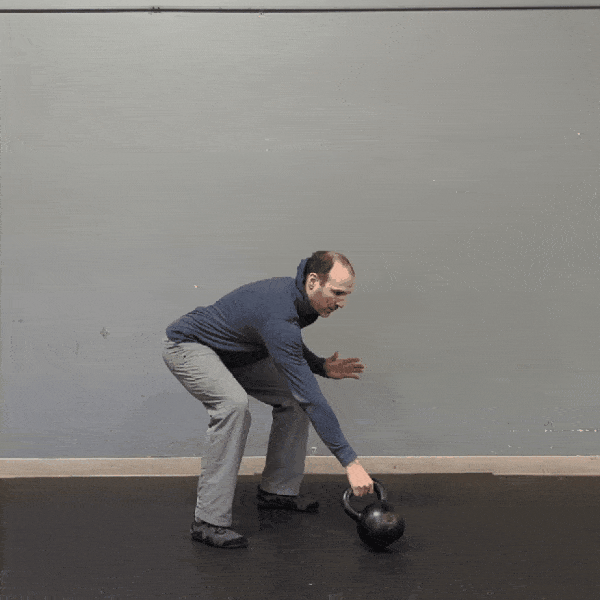
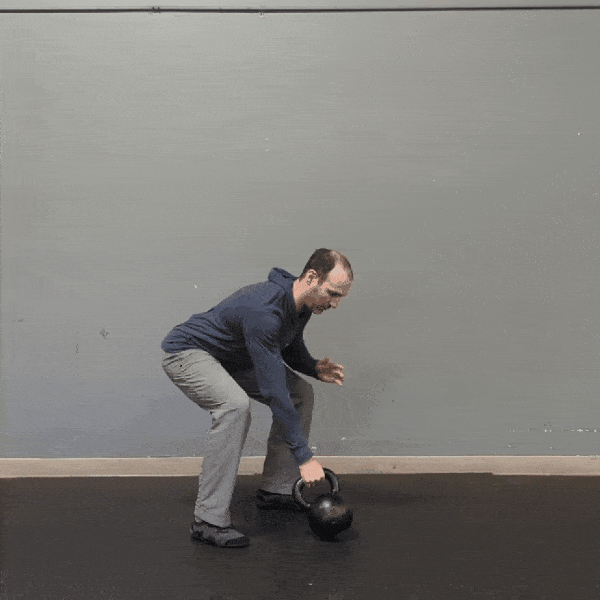
- Exercises with slower movements such as rows, presses, or get-ups (see the images of good and not-so-good examples below)
- Exercises with faster movements such as swings or snatches (again, see GIF examples below)
It should hopefully go without saying, but I’ll say it anyway: especially if this is the first time you’ve heard of shoulder packing, don’t progress through the list above until you can confidently pack your shoulders in the exercises from the previous line.
Putting it into practice
Any exercise that involves the shoulders and added weight (including bodyweight) should be performed with some degree of shoulder packing, for both safety and improved performance. That includes all of the exercises listed above as well as push-ups, pull-ups, bench press, cleans, deadlifts, and squats.
So the next time you’re at the gym (or buying groceries, water softener salt, or dog food), take a second or three to note how your shoulders feel when you pick up anything heavier than your phone. And if they don’t feel quite as packed as they could be, take another second or three—and possibly a slightly lighter weight—to try to produce the feeling.
You just might be surprised by how good it makes your shoulders feel. Not to mention both the short- and long-term results that are sure to follow.