
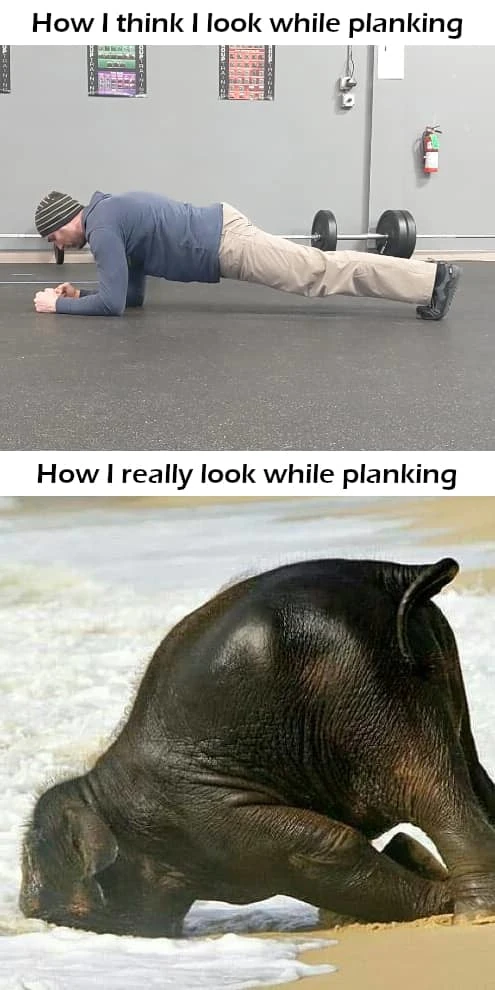
Years ago I stumbled upon an image on the Internet that looked something like this:
Ah, the Internet is always good for a chuckle, isn’t it?!? Anyway…
The plank is an oft-overlooked exercise due to its seeming simplicity. However, adding it to your training routine and practicing some of its subtleties can provide benefits as diverse as reducing lower back pain, increasing your squat strength, improving your 5k (or farther) time, and guaranteeing that the only time you strike a pose similar to the baby elephant above is when you’re practicing Down Dog in a yoga class.
Below are some common mistakes to avoid when practicing and details about how to perform the exercise well.
Common mistakes
A plank is technically just propping yourself up on your elbows and raising your hips off the floor. But letting your mind check out of the process after those two steps typically leaves you in poor alignment. That alignment isn’t likely to cause injuries, but most of your musculature will be minimally engaged as your body uses angles & arches to support its weight. And that’s not a great way to get stronger or burn off energy.
Below are a few suboptimal plank positions:
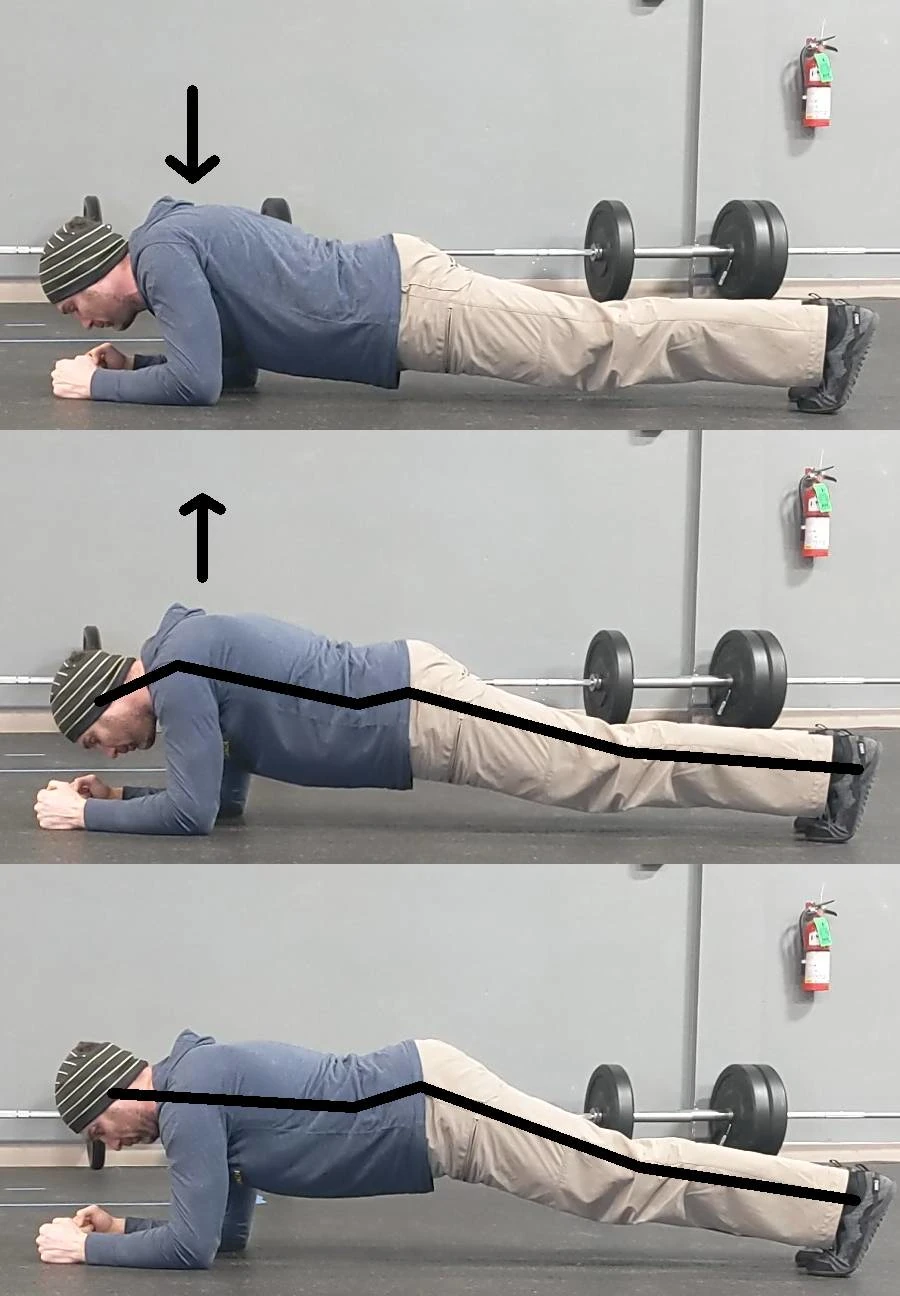
In each subsequent image, my posture did get better. But even by the end, I wasn’t actually straight. Here are a few other points to re-examine (and quick tips to fix them):
- Top image: Head and torso are sagging between the arms.
- Middle image: Torso is no longer sagging (“pushed” myself away from the ground); head is still sagging, lower back is arched, and knees are not locked.
- Bottom image: Head is no longer sagging (gave myself a “double chin” while looking between my hands); back is still arched, knees are still not locked.
So, what does a better plank look like? And how do you do it?
Line it up to tighten it up
Two simple steps will make your plank look and feel stronger.
- Lock your knees & squeeze your glutes to tuck your tailbone (i.e. pinch a coin)
- Pull your elbows and toes together (without actually letting them move)
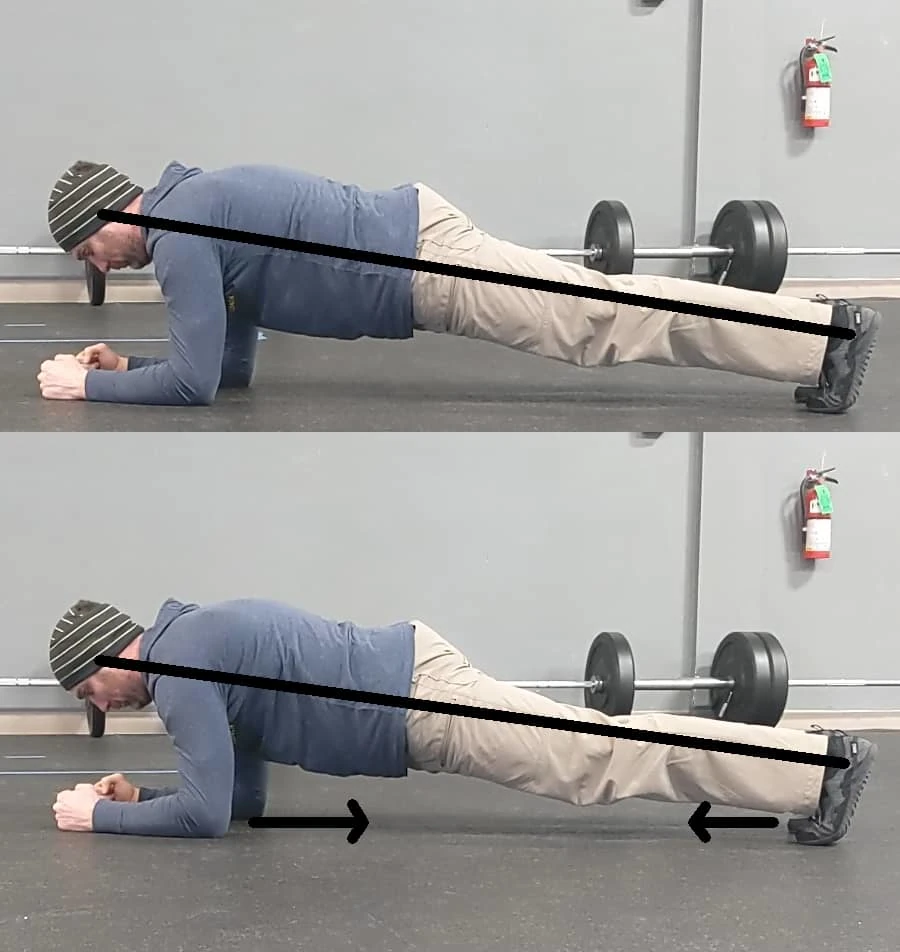
These steps can actually be performed in any order. If you squeeze your glutes first, you may notice your hips starting to sag again slightly. “Pulling” your elbows and toes together will raise your hips back into better alignment. If you reverse the order, your hips will raise slightly (step 2) and then drop back into place (step 1).
In any case, you should feel very strong contractions in your abs and lats (the big muscles on the sides of your back and below the armpits).
If you don’t feel that sensation, try this drill with a partner:
- Stand facing your partner. Put your arms in front of you as if you were planking.
- Lock your knees & squeeze your glutes.
- Your partner will then put their hands under your elbows and attempt to lift your arms. Resist by pushing your elbows toward the floor.
- Relax for a second, and then try to mimic the feeling in the actual plank position on the floor.
- If you’re just starting out and don’t feel like you have the strength to do this on the floor, lean against an elevated surface instead. (A countertop or the back or seat of a couch work well.)
Putting it into practice
A common strategy/goal in the fitness world today is to try to plank for continuously longer durations. While that isn’t necessarily bad, you’ll get stronger faster if you maintain alignment and squeeze harder over a shorter duration. In fact, you may not be squeezing hard enough if you don’t start to shake within a few seconds!
Try the following during each of your training sessions over the next month, and then let me know how much easier other activities become!
At the beginning or end of your training session, perform 1–3 planks using the tips above. Hold each plank for 10-30 seconds, resting for 1–3 times longer. (i.e. Plank for 15 seconds. Rest for 15–45 seconds. Repeat.)
As you get stronger:
- Decrease the rest periods from a 1:3 to a 1:1 work:rest ratio.
- Increase the time in the plank up to 30 seconds.
- Increase the sets up to 4 and then 5.
- Progress to hollow holds (and beyond)…