
A couple weeks ago I offered a brief overview of an uncommon squat option: the Zercher squat. This option provides a variety of benefits compared to other types of squats, not the least of which is that it can be performed safely without using a squat rack.
Of course, times will occur when you won’t have access to any equipment (e.g. work travel, vacation, deployments). While you might choose to perform pistols (see the last image in this tip) or bodyweight squats in those instances, both exercises have their own drawbacks.
Namely, relatively advanced strength, mobility, and skill baselines for pistols and greater endurance than strength benefits for bodyweight squats.
So for those instances when you have minimal equipment, strength development is your primary goal, and you fall anywhere on the experience spectrum, here’s another obscure exercise that can become your go-to leg-strengthening option.
Reverse Nordic Curls
Before you ask: yes, there is also a “regular” Nordic Curl. But that’s a tip for another time. 😉
To perform a Reverse Nordic Curl, assume a shoulder-width, tall-kneeling stance; that is, kneel on both knees. Use a towel, yoga mat, or other soft surface if your knees are easily aggravated.
Then engage your abs like you’re bracing for a punch, squeeze your butt (i.e. “pinch a coin”), and bend your knees more in order to lower your torso backwards toward the floor. When you reach a depth that seems appropriate (more on that in a minute), reverse the movement by extending your knees while keeping your abs and glutes engaged.
It should look like this when performed correctly:
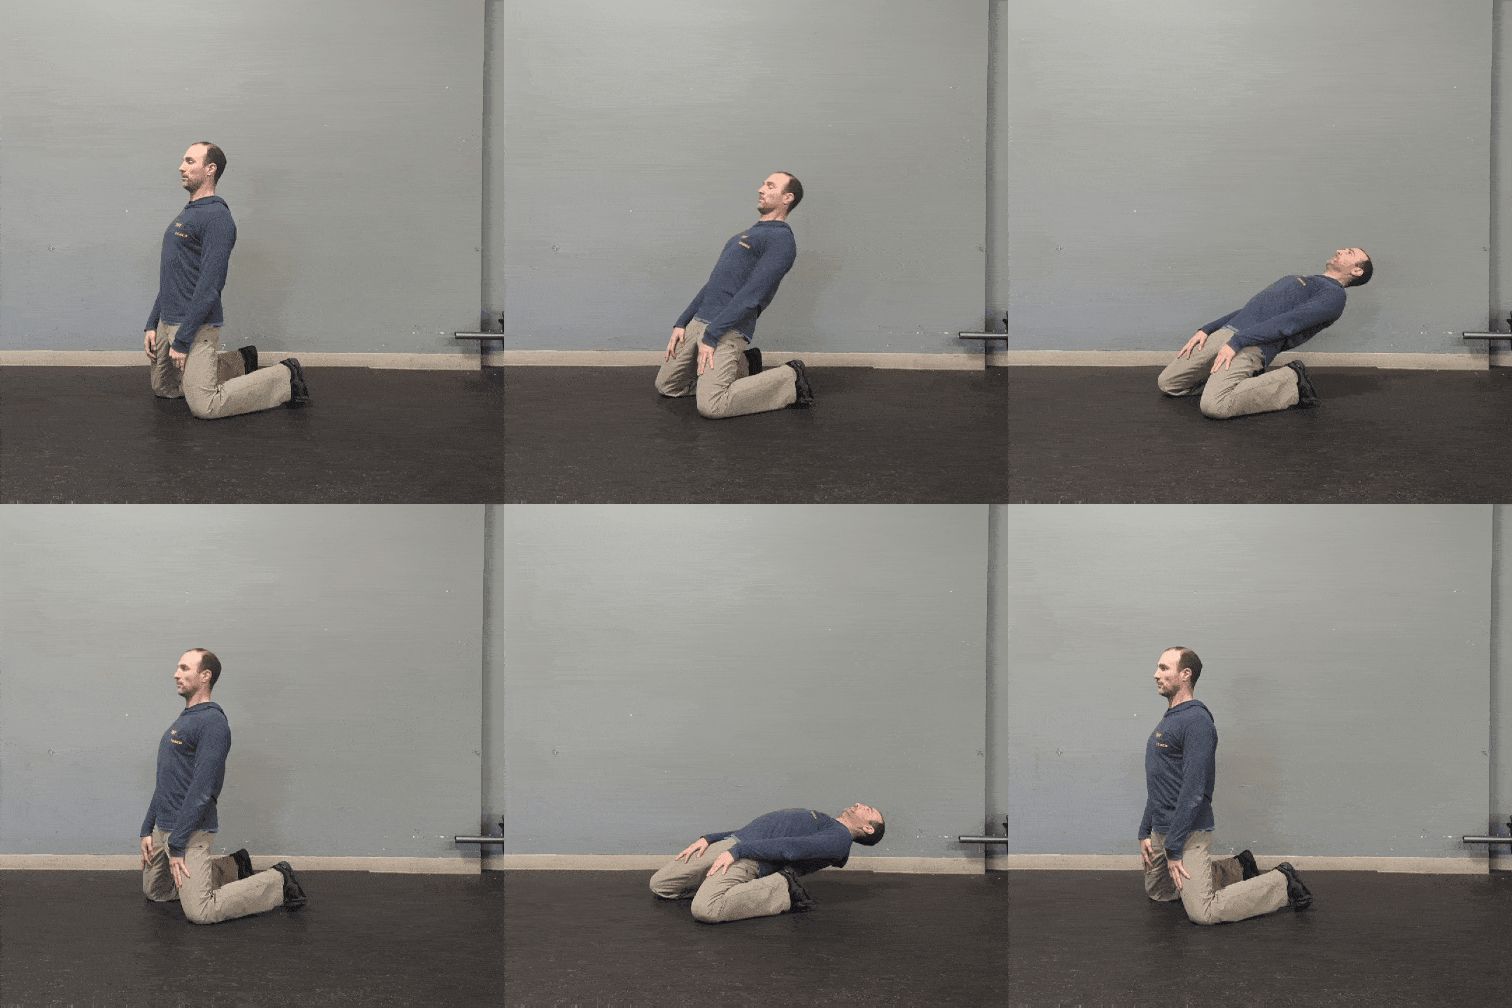
If that seems relatively easy, I challenge you to give it a try! But before you do, let me offer a word of caution about the most common mistake, two options for progression, and a target to work towards.
The most common mistake
Don’t let your glutes disengage and your hips flex. Doing so will work your quads (the muscles on the front of the thighs) less. That will make the movement easier, but it also misses the point of making your legs stronger.
And you’ll look like a worm. Or a Slinky…
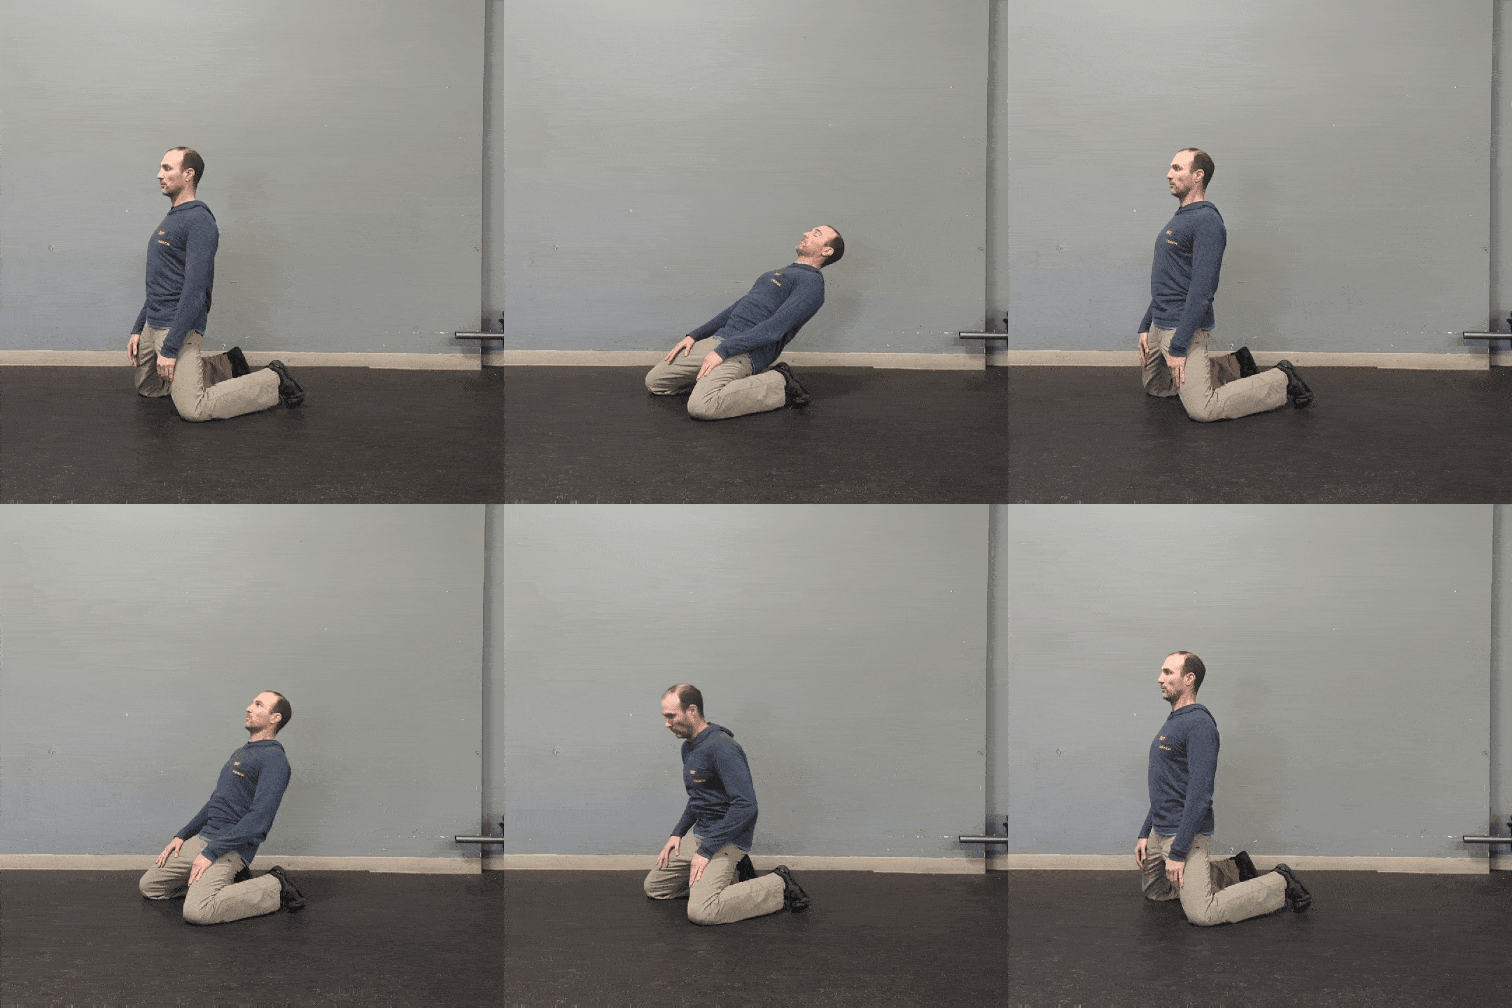
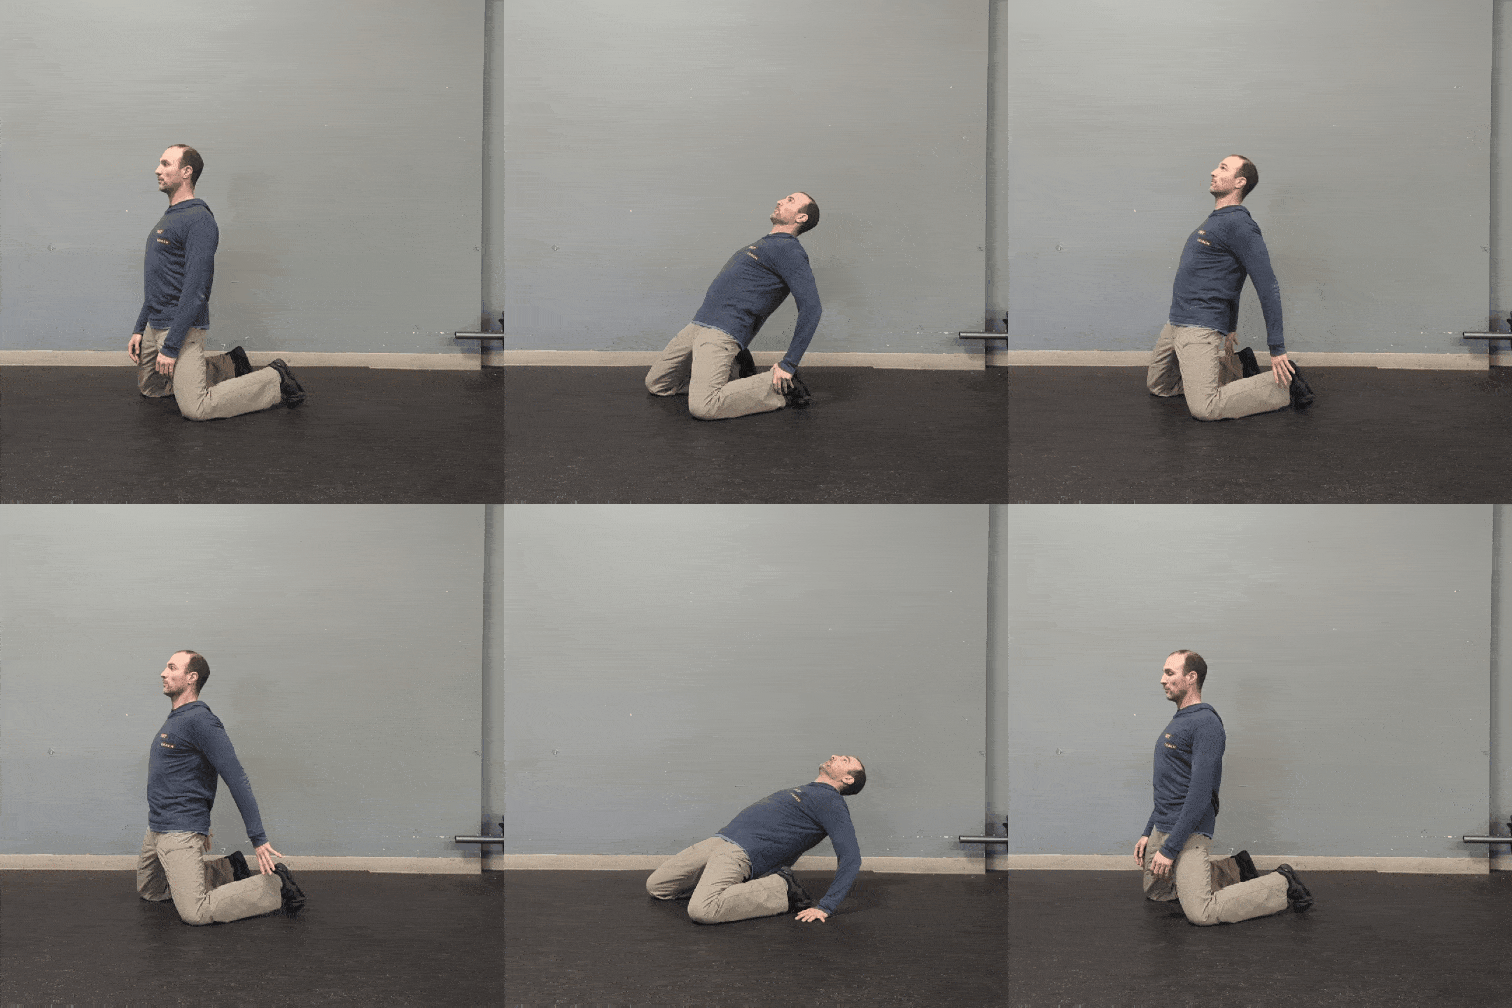
Two options for progression
The first option is to hold your arms behind you for support as you descend. Based on your current level of strength, reach for your heels (easier) or the floor (harder). This progression is the more challenging of the two options, but the benefit is that it still requires no equipment.
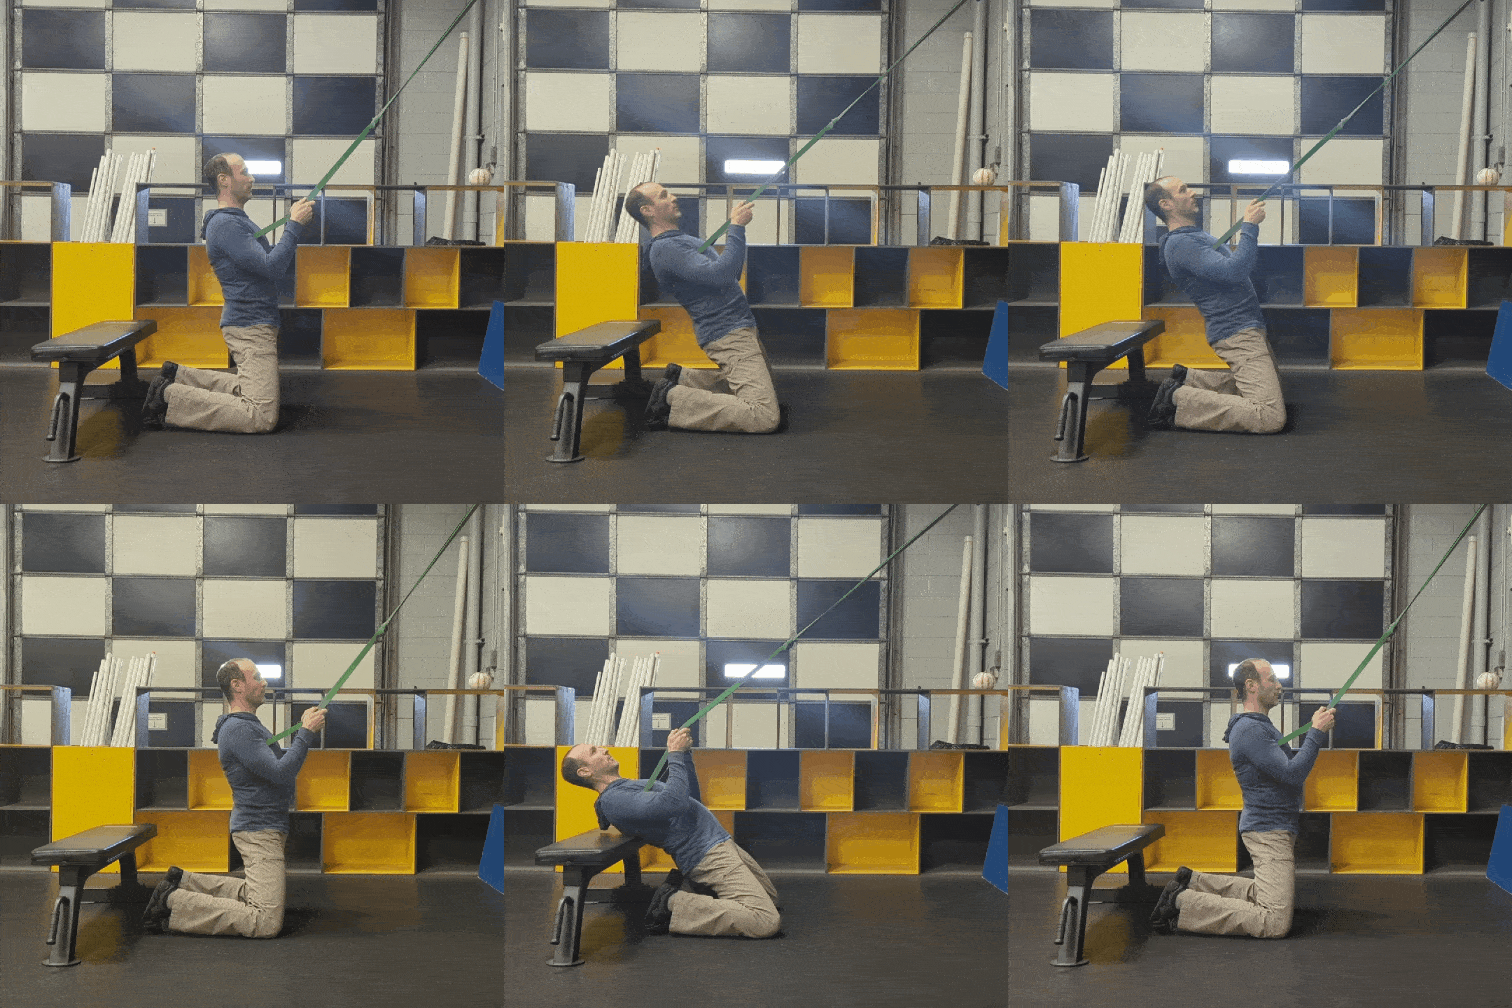
The second option is to wrap an exercise band or two around your torso and attach the opposite end to a post, pull-up bar, or rack. You may optionally place a bench just behind your feet as a target and last-resort support. This option is the easier of the two progressions, but it obviously requires a little extra set-up and equipment.
A target
It should go without saying, but I’ll say it anyway; any improvement is improvement, and you should give yourself a little high-five when it occurs.
That said — and assuming you have healthy knees that don’t hurt or that become healthier as you progress — I’ll suggest a strong marker of mastery to be two sets of five reps in which you touch your upper back or the back of your head to a 2½” book on the floor behind you. Or, if you have extremely healthy knees, to the actual floor.
Until you reach that point, keep practicing! 🙂💪
Putting it into practice
Besides being a solid stand-alone option (or would it be a kneel-alone option?!?), Reverse Nordic Curls can also be used as a small part of a larger program or as a warm-up activity.
As a warm-up activity, perform a couple sets of 5–8 reps to a depth that is easy for you to reach. As a small part of a larger program, 2–5 sets of 3–5 reps to a depth that is at or just beyond your comfort zone could be a decent option for an easy or medium day.
Either way, remember to keep those glutes squeezed!