
Raising your arms over your head is one of the most basic human movements. You do it when you put on a shirt, wash your hair, retrieve an item from a cupboard, place your luggage in an overhead bin, play a variety of sports (e.g. swimming, volleyball, basketball, racket sports), and exercise.
And, yet, it’s a movement at which many adults struggle, particularly near the end range of motion (ROM).
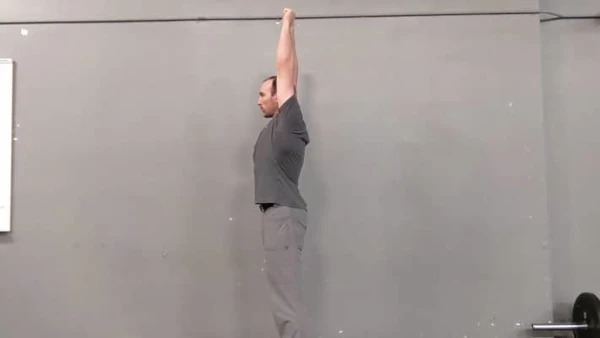
To test your ROM: Hold the right thumb in your left fist or vice versa, lock your elbows, and raise your arms overhead without arching your lower back or jutting your head forward. If your arms pass your ears, you’re probably doing OK.
Just double-check to make sure your lower back isn’t arched—you may notice this as either a flaring of the ribs or a pinch in your back just above your belt—and your head isn’t jutting forward. (Hint: These are common compensations that are easy to miss.)
It’s OK if you struggled a bit with that test. In today’s society, you have a lot of company.
A number of factors can contribute to a restricted overhead ROM, but one of the most common is less-than-optimal posture. That, in turn, is often due to having an exaggerated forward curve of the mid-spine (thoracic region) which typically develops because of too much sitting and hunching over our phones & computers, patients, and desks.
If you feel like that all hits a little too close to home, here’s a mobility & strengthening exercise that can help you improve your posture in under 10 minutes per day. And the best part is that you basically get to just sit there. Well, sort of.
Functional Movement Systems (FMS) Wall Sit
The FMS Wall Sit is one of my favorite postural improvement exercises because it’s fairly easy to perform, makes use of props to help you stretch and maintain the correct position, and gradually strengthens the muscles that will keep you in the correct position when you’re not using the props (i.e. in real life).
The props that you’ll need to do the exercise include the following:
- Some open wall space
- Two pillows or foam rollers
- A 3–4-foot stick (broom handles work well)
- A couple thick books (optional)
The Setup
Get into position by doing the following:
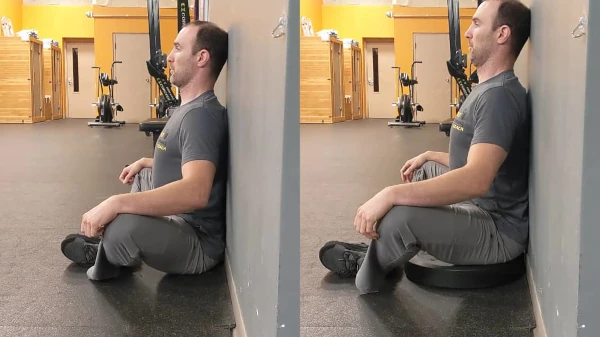
- Sit on the floor with your back against the wall and the bottoms of your feet together.
- Place the pillows or foam rollers under your knees/legs for support.
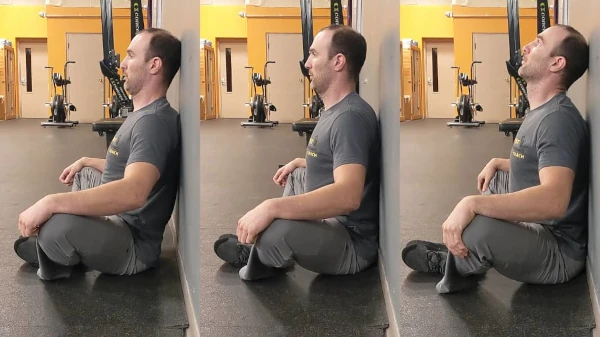
- Throughout the exercise, maintain three points of contact with the wall: the back of your pelvis, your mid-back, and the back of your head. If you are unable to maintain these three points of contact (which may very likely be the case at first), sit on the books. The elevation will make it easier to maintain contact with the wall.
- Place the stick in your lap for later use.
- Sit up as tall as you are able. Imagine that someone is lifting you up through the crown of your head.
The Stretching Component
Now that you’re in position, you can alternate between simply sitting tall and two different stretches.
To perform the first stretch:
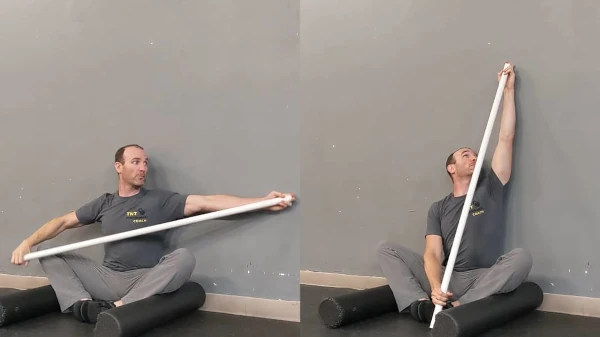
- Grab the end of the stick in your left hand and the middle or other end of the stick in your right hand.
- Place your left hand against the wall, horizontal to the floor.
- Using the stick for leverage, slide your left hand up the wall as far as you are able while keeping the back of your hand against the wall. Stop if your hand starts to pull away from the wall.
- Hold the position for 10-30 seconds before sliding your hand back down the wall.
- Repeat for 2-3 repetitions.
- You may optionally choose to look at your left hand throughout the process.
- Repeat on the right side.
To perform the second stretch:
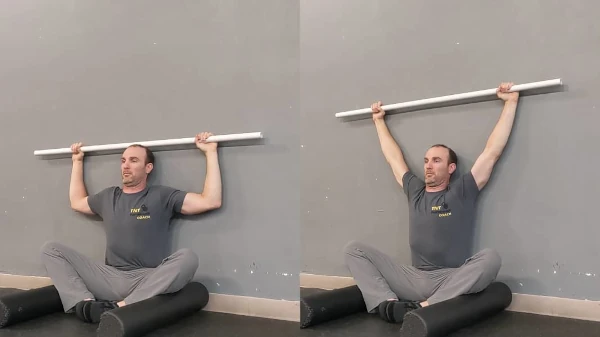
- Grab the stick with both hands, and rest it on the top of your head with the backs of your hands touching the wall.
- Look in either direction to make sure that your forearms are vertical, and readjust your grip as necessary.
- Slide both hands up the wall. The goal is to fully extend your elbows. However, your hands must remain in contact with the wall. If they start to pull away, you’ve gone a little too far.
- Slide your hands back down the wall until the stick once again rests on the top of your head.
- Repeat for 5-8 repetitions.
Putting it into practice
The FMS Wall Sit can and should be practiced every day at least until you are able to “cover your ears” using the initial test described above.
You may find that you’re only able to sit in the position for 2–3 minutes when you first add it to your routine. At that point, the muscles in your mid-back will likely be screaming at you to stop. So, come out of the position, roll your back on the foam roller for a few reps to soothe the screaming muscles, and then continue on with your day.
As your mobility and strength improve, increase the time spent in the position up to 6–8 minutes. When you’re finally able to “cover your ears”, you may choose to continue your daily practice or reduce the frequency to 1–3 times per week.
In any case, expect to practice for 3–6 weeks before noticing postural improvements. If you haven’t noticed even the slightest improvement in that time or if you experience pain at any time, you may want to consider seeing a specialist (e.g. physical therapist, massage therapist, chiropractor).