Who has two thumbs and sits for far too many hours in an average day?
This guy. 👍👍
And, in all likelihood, you too if you’re like the average American.
Sitting too much can lead to a variety of issues, not the least of which is tight hips. And having tight hips leads to decreased strength and power (bad for athletes), internal “friction” leading to a slower pace when moving (bad for anyone who runs… or walks), and sometimes lower back pain (bad for anyone).
Of course, there are a few simple methods to minimize or reverse that tightness. The half-kneeling lunge stretch is one of those methods, if it’s done correctly.
Before I describe what the stretch is and how to get the most out of it, let’s check to see how tight your hips might be and set a baseline to see how much the stretch helps.
The baseline test
A simple way to check for tight hips is to perform a bodyweight squat. Preferably use your phone to take a picture at the bottom for a post-stretch comparison.
If you’re just starting out or getting back to exercise after a layoff and don’t feel that you can squat safely yet, try this baseline test by almost sitting down in a chair: hold on to a table, countertop, or partner for support, as needed, and squat so that your butt just barely touches the seat of the chair. Then stand back up.
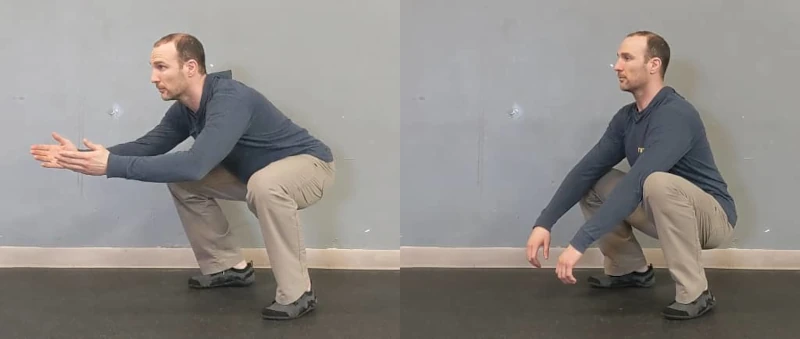
Your hips are likely somewhat tight if any (or all) of the following conditions are present at the bottom of the squat:
- Large forward lean of the torso, with or without forward-reaching arms to maintain balance (see image on left above)
- Hips higher than knees, with or without forward-leaning torso
- Back is rounded—looks like “)” instead of “\” (image on right above shows “\”)
If your squat happens to look somewhat like the image on the right (or better!), you’re probably doing alright. But try the following stretch anyway as you’ll still likely experience some improvement.
Performing the stretch
You’ve probably done or seen the half-kneeling lunge stretch before now. But you may have not known about or missed a few subtleties that will make it an even more effective hip-loosening stretch.
Here’s how to do it:
- Get into a lunge position. Put a towel or yoga mat under the knee that’s on the ground for a bit more comfort.
- Preferably flex your back toes. They can be pointed if it bothers your knee, however.
- Keep your hips square (more on this in the “mistakes” section below), and contract the glute on the side with the knee on the ground. Simply doing this should produce a stretch in the front of that hip.
- Put your hands on your hips, and stretch forward from the hips (more on this in the “mistakes” section).
- Perform 10 mini “pulses” of a couple inches forward & backward. After the last pulse, hold the stretch for 10-15 seconds. Repeat the 10 pulses, going a little deeper into the stretch. Remember to keep the glutes contracted! After the last pulse of the second set, hold for 20 seconds. Repeat the 10 pulses for one more set, and then hold the final stretch for 30 seconds!
- Slowly back out of the stretch. Stand up and shake out briefly. Notice that the stretched hip likely feels as if it’s made of Jell-O compared to the un-stretched hip. (Your glutes, hamstrings, and quads might also feel a bit like they’re on fire. You’re welcome. 😉)
- Repeat on the second side.
- Re-test your squat.
Common Mistakes
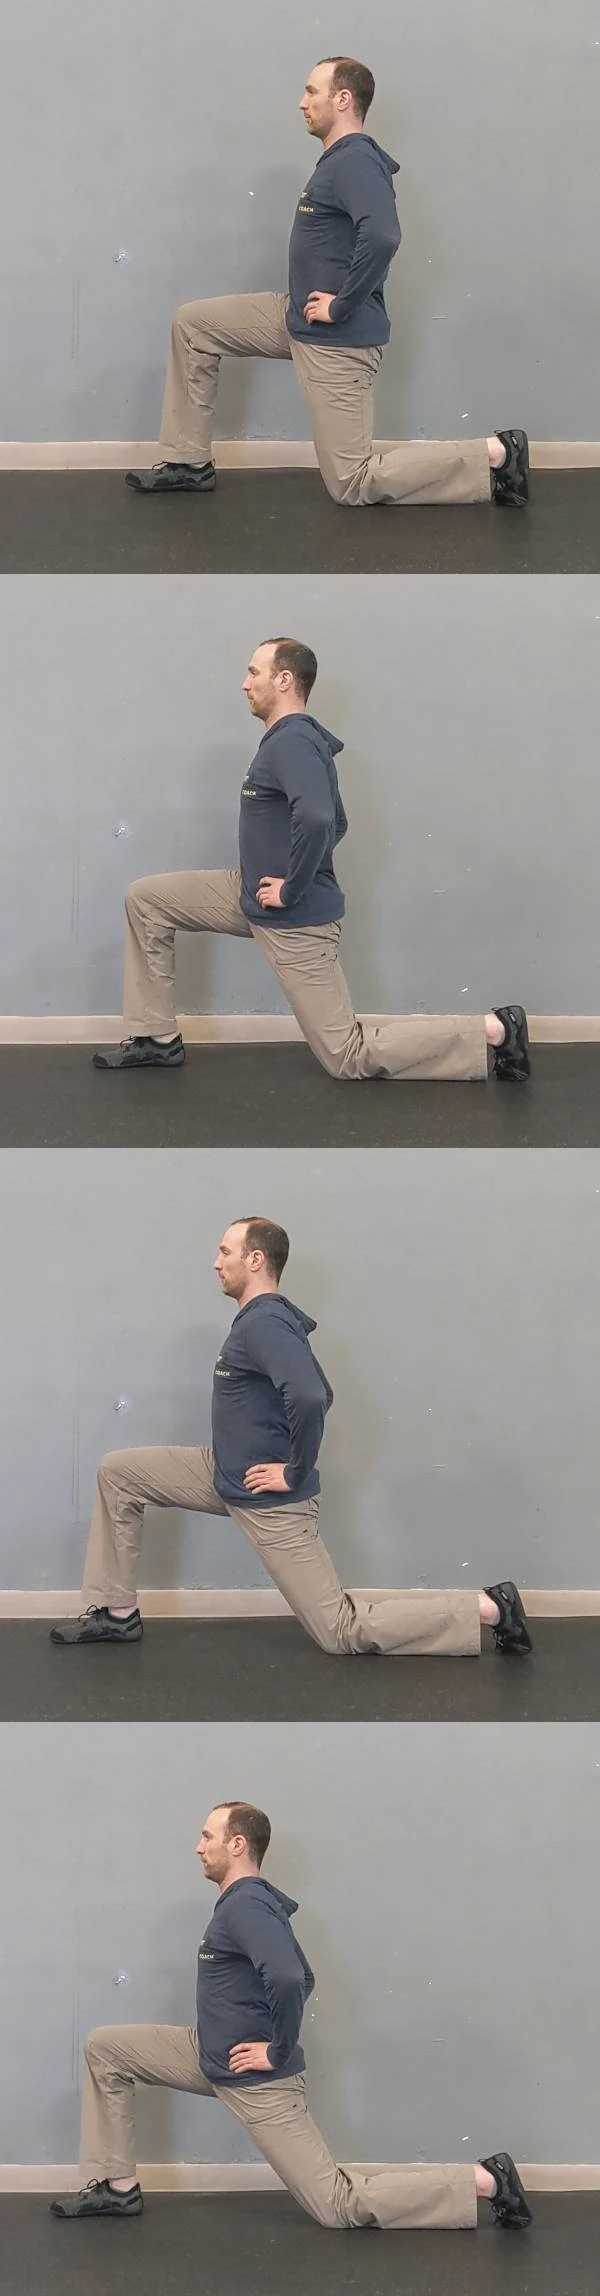
Below are the two most common mistakes made in both the set-up and the stretch. The middle picture in each image is the correct variation, for comparison.
In the set-up position, make sure that:
- Your hips are parallel (middle image; top image shows an elevated right hip)
- Your glute is squeezed producing a posterior pelvis tilt (middle image; bottom image shows a relaxed glute and anterior pelvis tilt)
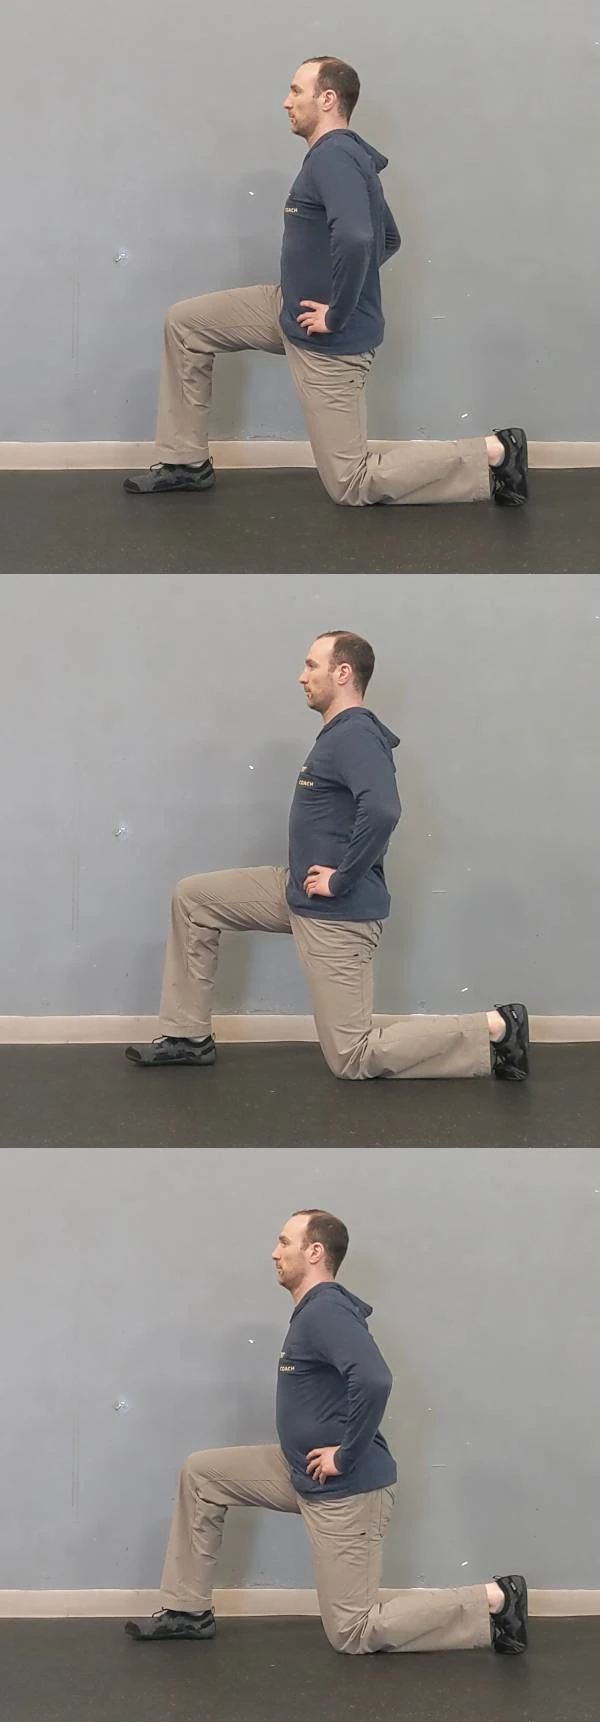
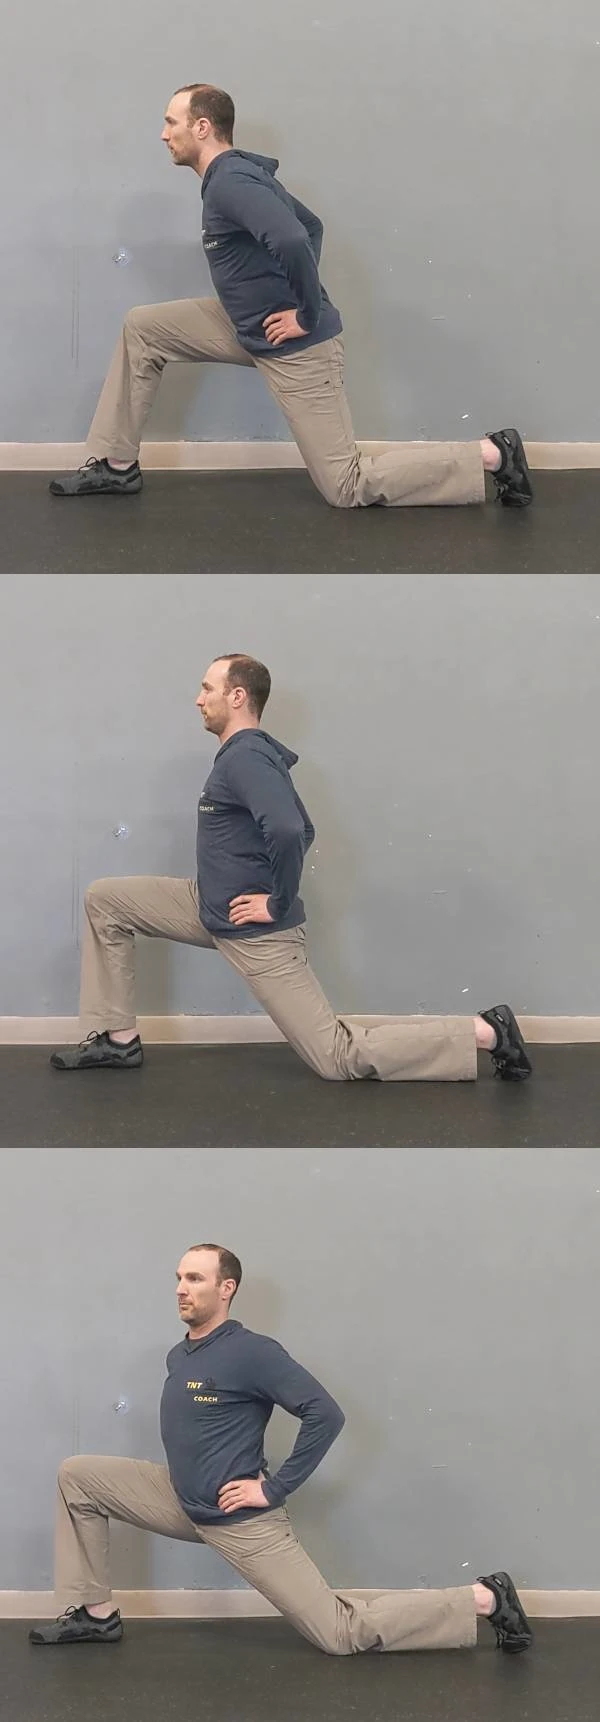
In the stretched position, make sure that:
- You initiate the stretch with your hips (middle image; top image shows a shoulder-initiated “stretch”)
- You maintain neutral/square hips (middle image; bottom image shows rotated hips, causing more of a groin stretch than a hip stretch… not a bad thing, necessarily, but not what we’re going for here)
Putting it into practice
Particularly if you have a desk job, try adding this stretch once or twice throughout the day—get your co-workers to join in on the fun—or as the first thing you do when you get home.
If you experience minor low back pain, do this stretch first thing in the morning when you get out of bed and any time throughout the day when your back starts to “let you know it’s there”.
This is also a perfect way to start any lower body training session (squats, deadlifts, lunges, kettlebell swings, etc.).
Last but not least, you always have one more homework assignment after performing this stretch, no matter which of the situations above is the reason for doing it: do a set of 5-10 bodyweight squats or lunges.
Without going into too much detail, performing even a light strengthening exercise immediately after you’ve improved your range-of-motion with the stretch will “convince” your body over the long-run that it’s “safe” to maintain your newfound range-of-motion instead of regressing back to the old status quo.