
Contrary to what you might think, no one replaced my keyboard’s “a” with “o” before I wrote the title for this tip. Rather, I was using my (arguably terrible) Dad Joke-loving sense of humor as a way to introduce one of my favorite mobility drills: the Tactical Frog.
I prefer to keep my mobility practices as efficient as possible by utilizing drills that target a number of areas. (That’s why I also love the Brettzel and another drill I’ll cover next week.)
The Tactical Frog ranks among my favorites because its various steps target the hips (in a couple ways), hamstrings, and groin, all of which can improve mobility in (and, subsequently, technique and capacity for) lower body exercises like squats, hinges (e.g. deadlift, swing), and lunges.
While it doesn’t specifically target the back, the improved hip mobility could also contribute to reduced back pain if you have it or just make you feel limber and awesome if you don’t.
So without any further ado, here’s how to get the most out of the drill:
The Tactical Frog
First, find a very soft/padded surface unless you want to improve your hip mobility at the expense of your knees. A couple folded yoga mats or towels should do the trick.
Then get down to the ground on the insides of your knees and your elbows (see pic below). Stretch your knees as far apart as possible, like you’re attempting to do the side splits. At this point, you’ll want your feet directly behind your knees and pointing outward. (Three guesses as to where the drill got its name…)
Keeping your lower back either neutral or slightly extended (flat or arched, not rounded), rock forward and backward for a minute or two.
You can rock forward as far as you like. When you’re rocking backward, you’ll get to a point where your hips seem to lock or get stuck. At this point you probably could continue rocking backward if you allowed your spine to round, but don’t do that!
Instead, just hang out for a couple seconds while trying to relax slightly. Then rock forward again and repeat the process. That’s step one.
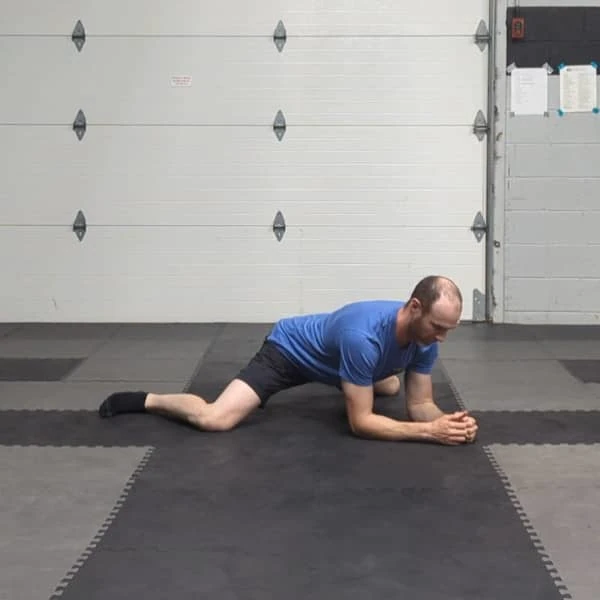
Step two is where I think much of the magic happens, although you might hate it at first if you’re like most of the people to whom I’ve shown the drill.
After a minute or two, rotate one hip with the intention of pointing the bottom of your foot toward the ceiling. Depending on your base hip mobility, you may not get very far. In any case, your (short- or long-term) goal is to rotate enough so that your quad (front of the thigh) touches the ground.
Return to the starting position and repeat with the other leg, alternating back and forth for another minute or two.
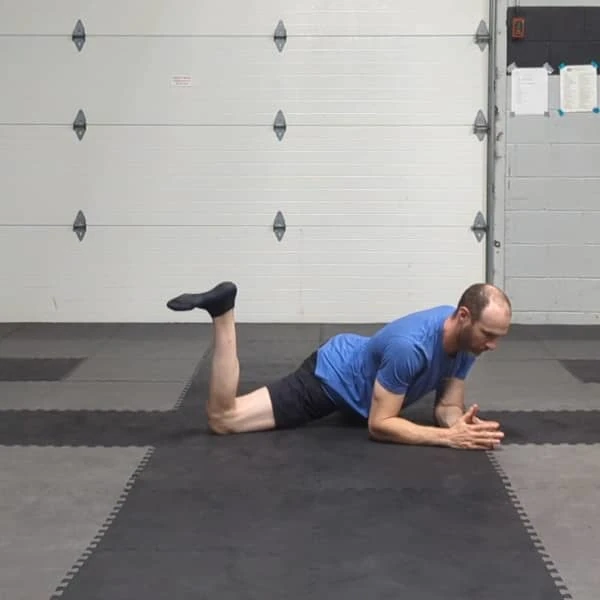
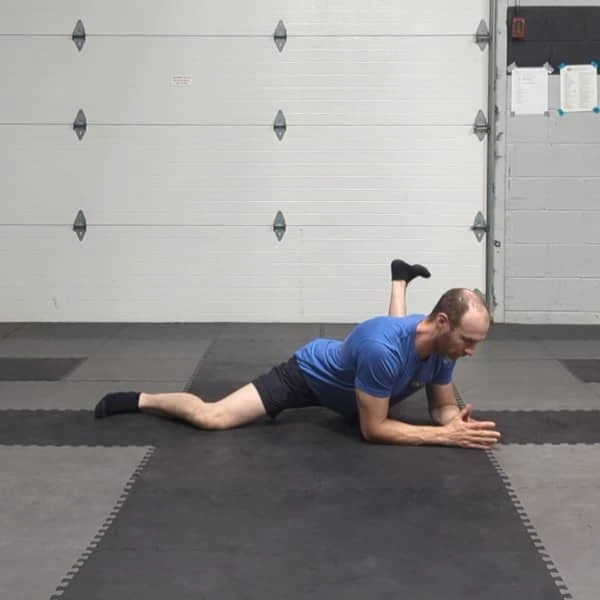
At this point you have three options. You could:
- Stop if you’ve had enough (which might be the case the first couple times you do the drill). To get out of the position, bring your feet together and slowly rock forward onto your stomach before getting up as you see fit. Then do a 90/90 stretch (see details toward the end of the tip) to alleviate some potential cramping.
- Go back to step one before moving onto the third and/or fourth steps. This is the preferred choice.
- Move directly on to step three.
Whenever you choose to move on to step three, the directions are simple: straighten one leg out to the side (on the same plane as your other knee) and then rock back and forth as in step one.
In this step, keep the inside of your foot on the ground while rocking. And, of course, remember to repeat on the second side.
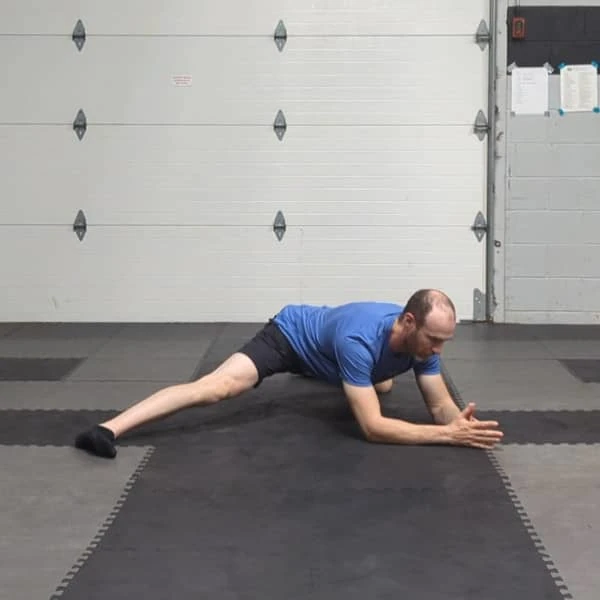
And finally, should you choose to channel your inner Harry and Marv—not giving up but “thirsting for more”—repeat step three with two slight variations: First, come up to your hands instead of your elbows. Second, rotate your toes toward the ceiling as you rock backward and back to the floor as you rock forward.
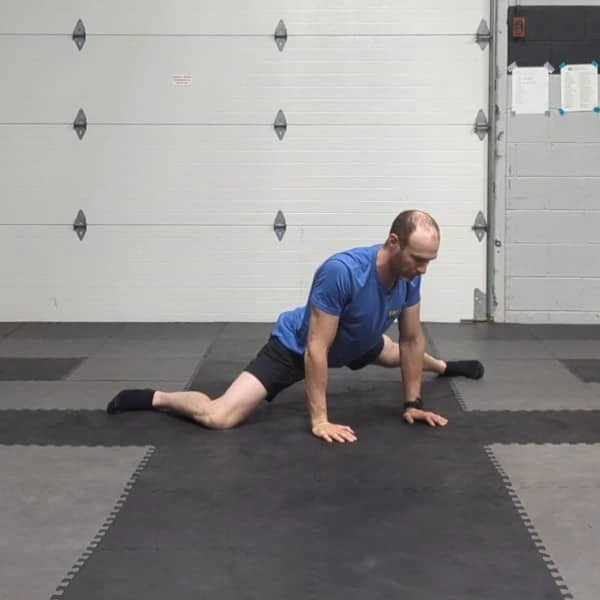
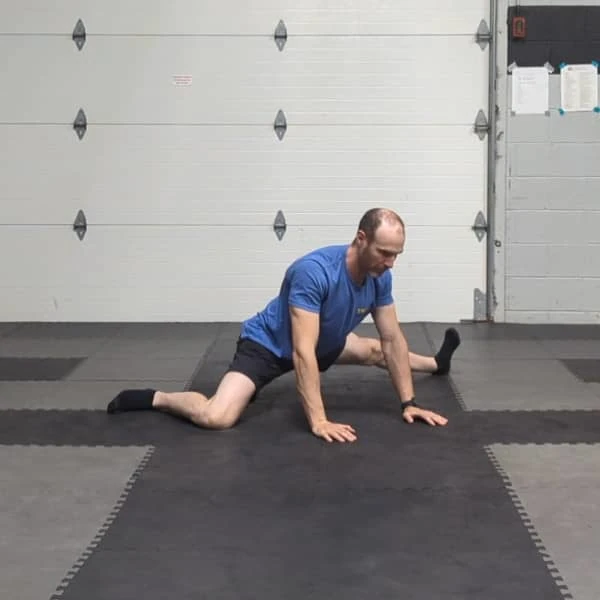
After you’ve completed a few minutes of the step above (or if you decided to stop after step two or three), spend a few minutes doing the 90/90 stretch. As I had mentioned, it will help alleviate some potential cramping and leave your hips feeling as limber as Gumby.
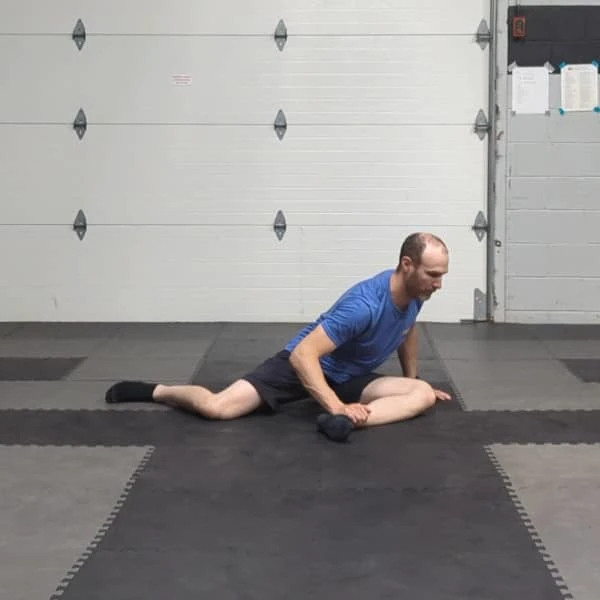
To do the 90/90 stretch, sit on the floor with one leg in front and the other to the side. Both knees should be bent to 90 degrees — again, three guesses as to where the drill got its name — leaving each thigh parallel to the opposite shin.
Keep your spine straight and tall by imagining a string pulling up from the crown of your head. Then lean forward, aiming not to touch your chest to your leg but rather to bring your sternum to the ground in front of your knee. (You won’t get there, but it serves to paint the right picture.)
You’ll know you’re doing the drill correctly if you feel a stretch on the outside of the hip of the front leg.
Putting it into practice
As with any program or drill, your results will improve with consistency. So if you add the Tactical Frog to your routine, start with a plan you feel confident about being able to maintain.
That might look like a couple minutes of steps one and two before each strength training session (e.g. twice per week) if you’re either just beginning a fitness/mobility program or your goal is simply to maintain an already high degree of mobility.
Alternatively, it could be performing 1–3 complete cycles of steps one through four 3–5 days each week if you’re intermediate or advanced and would like to take your mobility to the next level.
Whatever the case, I’ll bet that after only a couple sessions the Tactical Frog will become one of your favorite drills too.